Linux환경에 LogViewer 구성
1. 사용자 계정 추가 & 기본 설정
root 계정으로 진행
1.1. 사용자 추가
useradd elastic  #elastic이라는 사용자를 추가
passwd elastic   #elastic 사용자의 비밀번호를 설정
su - elastic     #elastic 계정으로 전환하여 로그인 가능여부 확인
su -             #root계정으로 전환
1.2. 기본 설정
1. 'limits.conf' 설정파일 편집
ulimit -n 32000

vi /etc/security/limits.conf
i (입력모드) 클릭 후 설정파일 편집
.
.
elastic       hard    nofile       65536
elastic       soft    nofile       65536
elastic       hard    nproc        65536
elastic       soft    nproc        65536
.
.
해당 내용 추가 후 Esc 클릭하고 :wq(저장하고 나가기) 입력 후 ENTER
2. 'sysctl.conf' 설정파일 편집
sysctl -w vm.max_map_count=262144

vi /etc/sysctl.conf
i (입력모드) 클릭 후 설정 파일 편집
vm.max_map_count=262144
설정 파일에 해당 내용 입력 후 Esc -> :wq -> ENTER
3. 재부팅 실행
reboot
재부팅을 해야 해당 설정이 적용되고 이후 진행이 가능
2. JAVA Path 설정
elastic 계정으로 진행
2.1. 파일 압축 해제
jdk-8u111--linux-x64.tar.gz 파일이 있는 경로에서 압축해제
tar -xvf jdk-8u111-linux-x64.tar.gz
2.2. 환경변수 설정
cd /home/elastic

vi .bashrc
i 클릭 후 '-fi' 하위에 아래 내용 입력
JAVA_HOME=/home/elastic/Softcamp/jdk1.8.0_111
CLASSPATH=.:$JAVA_HOME/lib/tools.jar
PATH=$PATH:$JAVA_HOME/bin
export JAVA_HOME
export CLASSPATH
export PATH
Esc -> :wq -> ENTER
저장하고 vi 편집기 종료 후 파일 실행
. .bashrc
2.3. jdk 환경변수 설정 확인
java 버전을 확인하여 정상 적용 되었는지 확인
java -version
정상적용
비정상
3. LogViewer 설치
elastic 계정으로 진행
3.1. 설치파일 압축해제
tar -xvf LogViewer210607.tar
3.2. 프로세스 실행
cd /home/elastic/Softcamp/LogViewer/app/tomcat8.5

./tomcat_start.sh
3.3. 정상 동작 유무 확인
1. 명령어로 프로세스 확인
ps -ef | grep tomcat
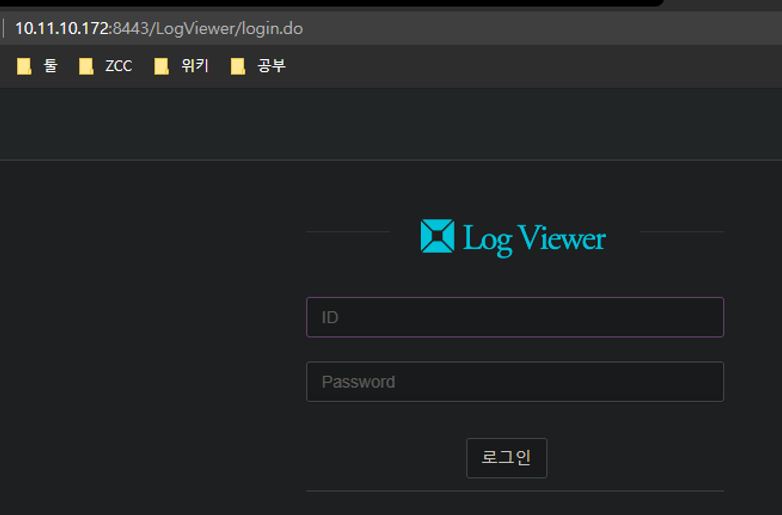
2. 웹페이지 접속 URL : http://설치IP:8443 입력 후 접속 유무 확인
3.3. Log 확인 방법
해당 경로에 있는 로그 파일 확인
cd /home/elastic/Softcamp/LogViewer/log/tomcat

vi catalina.out
4. ElasticSearch 설치
elastic 계정으로 진행
4.1. 설정파일 편집
vi /home/elastic/Softcamp/LogViewer/app/ELK/cluster_mnd/cluster/node1/config/jvm.options
vi /home/elastic/Softcamp/LogViewer/app/ELK/cluster_mnd/cluster/node2/config/jvm.options
vi /home/elastic/Softcamp/LogViewer/app/ELK/cluster_mnd/cluster/node3/config/jvm.options
/home/elastic/Softcamp/LogViewer/app/ELK/cluster_mnd/cluster/(node1~3)/config/jvm.options
해당 경로에 있는 jvm.options 설정파일을 편집
=> 가장 하단에 -Djava.rmi.server.hotname을 elasticsearch가 설치되어 있는 IP로 변경
4.2. 설치파일 실행
cd /home/elastic/Softcamp/LogViewer/app/ELK/cluster_mnd/cluster/

./es_cluster.sh
해당 경로에서 설치파일 실행
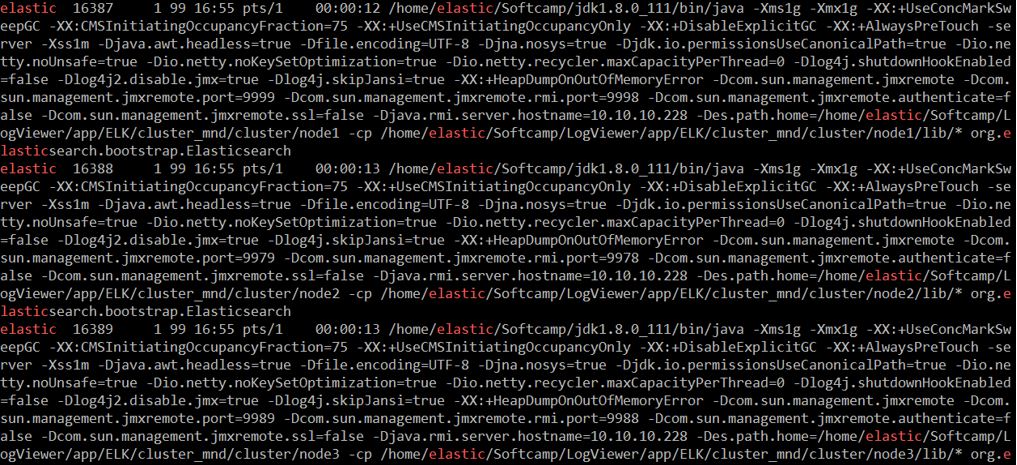
4.3. 정상 동작 유무 확인
ps -df | grep elastic
5. LogStash 설치
elastic 계정으로 진행
5.1. 설치파일 실행
cd /home/elastic/Softcamp/LogViewer/app/ELK/logstash-5.5.0

./bin/logstash -f logstash-softcamp.conf
해당 경로에서 설치파일 실행
5.2. 정상 동작 유무 확인
ps -ef | grep logstash
6. 서비스 등록
재부팅시 LogViewer용 tomcat, ElasticSearch, logstash 서비스 재시작 해야하기에 서비스로 등록한다
6.1 LogViewer용 Tomcat�
6.2 ElasticSearch
6.3 logstash
서비스 파일 생성
sudo vi /etc/systemd/system/logstash.service
서비스 파일내 설정값 추가
설치경로 /home/elastic/Softcamp/LogViewer인 예시
[Unit]<br/>
Description=Logstash

[Install]<br/>
WantedBy=multi-user.target

[Service]<br/>
User=elastic
Environment="JAVA_HOME=/home/elastic/Softcamp/LogViewer/app/jre"
# Type=forking # 자식 프로세스 생성 후 실행이 필요할 경우 지정
ExecStart=/home/elastic/Softcamp/LogViewer/app/ELK/logstash-5.5.0/bin/logstash -f /home/elastic/Softcamp/LogViewer/app/ELK/logstash-5.5.0/softcamp-jdbc-mssql-real_src.conf
재부팅시 서비스 실행 등록
sudo systemctl enable logstash
sudo systemctl daemon-reload
7. 웹 콘솔
7.1. 웹 콘솔 접속
- URL : http://IP:8443
- ID : logmanager
- PW : 초기패스워드(softcamp)
7.2. DB 접속 환경 설정
cd /home/elastic/Softcamp/LogViewer/data/logViewer/conf/

vi context-datasource.xml
설정 파일을 편집
<property name="driverClassName" value="oracle.jdbc.driver.OracleDriver"/>
<property name="url" value="jdbc:oracle:thin:@127.0.0.1:1521:ORCL"/>
        <property name="username" value="ds40a"/>
<property name="password" value="softcamp"/>
6.3. 웹 콘솔 접속 환경 설정
JSON 파일 편집
cd /home/elastic/Softcamp/LogViewer/data/logViewer/JSON/

vi logViewer.json
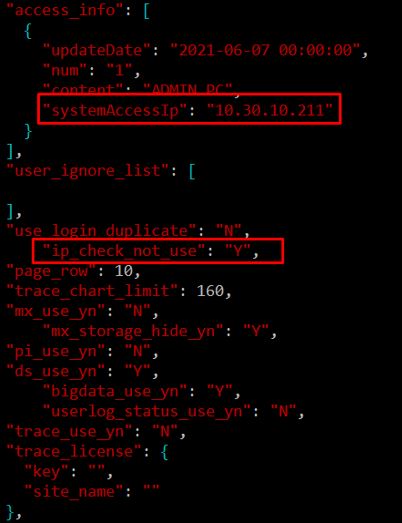
접속할 IP를 입력하고 모든 IP로 접속 가능하게 설정.
"access_info" : [
  {
    "updateDate":
    "num":
    "content":
    "systemAccessIp": "접속할 IP 입력"
  }
]
"use_login_duplicate":
    "ip_check_not_use": "Y",  #"systemAccessIP"를 포함한 다른 IP로 접속 가능
.
.


